Open and use a shared mailbox in Outlook 2016 and Outlook 2013
A shared mailbox is not designed for direct log on though. The user account for the shared mailbox itself should stay in a disabled state.
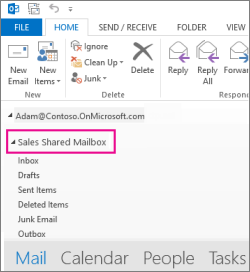
Add a shared mailbox to Outlook
After your admin has added you as a member of a shared mailbox, close and then restart Outlook. The shared mailbox should automatically display in your Folder pane in Outlook.
What if it didn't work?
If your admin only recently added you to a shared mailbox, it may take a few minutes before the shared mailbox appears. Wait a bit and then close and restart Outlook again.
If that didn't work, then manually add the shared mailbox to Outlook:
Open Outlook.
Choose the File tab in the ribbon.
Choose Account Settings, then select Account Settings from the menu.
Select the Email tab.
Make sure the correct account is highlighted, then choose Change.
Choose More Settings > Advanced > Add.
Type the shared email address, such as info@contoso.com.
Choose OK > OK.
Choose Next > Finish > Close.
Send mail from the shared mailbox
Open Outlook.
Choose New Email.
If you don't see the From field at the top of your message, choose Options > From.
Click From in the message, and change to the shared email address. If you don't see your shared email address, choose Other email address and then type in the shared email address.
Choose OK.
- Finish typing your message and then chooseSend
From now on when you want to send a message from your shared mailbox, the address will be available in your From drop down list.
Whenever you send a message from your shared mailbox, your recipients will only see the shared email address in the message.
Reply to mail sent to the shared mailbox
Open Outlook.
Open the email message you want to reply to.
From field at the top of your message, you should see the name of your shared mailbox. If you don't, choose the From dropdown box and choose your shared mailbox.
Finish typing your message and then choose Send.
When you want to send a message from your shared mailbox, the address will be available in your From drop down list.
Whenever you send a message from your shared mailbox, your recipients will only see the shared email address in the message.
Related Articles
Microsoft Office 365 Mailbox storage limits
Microsoft Office 365 Exchange Online limits More Info Mailbox storage limits The amount of mailbox storage available is determined by the mailbox type and the user’s subscription license. Administrators can reduce maximum mailbox sizes per user or ...Third party Smtp setting in office 365
Configure a connector to send mail using Office 365 SMTP relay More Info This option is more difficult to implement than the others. Only choose this option when: SMTP client submission (Option 1) is not compatible with your business needs or with ...Printer & Devices Smtp settings
Configure a connector to send mail using Office 365 SMTP relay More Info This option is more difficult to implement than the others. Only choose this option when: SMTP client submission (Option 1) is not compatible with your business needs or with ...Microsoft Office 365 Email Receiving and sending limits
Receiving and sending limits More Info Receiving and sending limits are applied to combat spam and mass-mailing worms or viruses. These limits help to protect the health of our systems and keep our users safe. Receiving limits Receiving limits apply ...Transport Rule for Spam & phishing emails
We have investigated the issue on our end and found that the automated email being received to your ID. This is because is due to a phishing email with malicious content is sent to your ID. The Office 365 Microsoft Exchange has filtered the content ...